Best Haircuts for Curly Hair 2025: Complete Guide to Embracing Your Curls
Curly hair has gotten complicated with all the product recommendations, curl-typing systems, and cutting techniques flying around. As someone who spent years fighting my own curls before finally learning to work with them, I learned everything there is to know about finding the right cut for curly hair. Today, I will share it all with you.
I’ll be straight with you — I wasted years straightening my hair because I didn’t know how to make my curls look good. Then I found the right stylist, got the right cut, and it changed everything. My curls went from frizzy chaos to something I actually loved. The haircut was the turning point. Not the products, not the techniques — the cut itself. So let’s start there.
Understanding Your Curl Type
Before you pick a haircut, you need to know what you’re working with. I know, I know — curl typing can feel overly complicated. But knowing your general category genuinely helps when you’re talking to a stylist or shopping for products. Here’s the simplified version:
- Type 2 (Wavy): Loose S-shaped waves that tend to get frizzy when you look at them wrong. Mine fall somewhere in this range on good days.
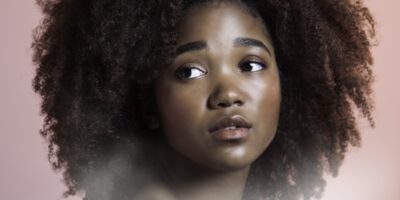
- Type 3 (Curly): Well-defined spirals that spring up when dry. Gorgeous but prone to dryness — moisture is everything here.
- Type 4 (Coily/Kinky): Tight coils or zig-zag patterns. The most delicate texture and needs the most careful handling.
Each type responds differently to cutting techniques and products. What works for my waves would be a disaster for someone with tight coils. Keep your type in mind as you read through this guide.
Best Haircuts for Curly Hair
1. Curly Layered Bob
Best for: Type 2-3 curls, medium thickness
Length: Chin to shoulder
Styling time: 10-15 minutes

Probably should have led with this section, honestly. The curly layered bob is hands-down the most flattering cut for curly hair that I’ve personally seen work on dozens of people. The layers remove weight, and when weight comes off curls, they bounce up and come alive. It’s almost like magic watching someone go from heavy, flat curls to springy, defined ones just from a good layered bob cut.
The critical thing: Your stylist needs to cut each curl individually while it’s DRY. Never, ever let someone cut your curly hair wet. Curls shrink when they dry, so what looked perfect in the chair becomes way too short when it dries. I learned this the hard way and cried in my car afterward.
Why it works: Less weight means curls spring up naturally. Strategic layers prevent the dreaded triangle shape that makes all of us curly-haired folks look like we’re wearing a hair tent.
2. Long Layers for Maximum Movement
Best for: All curl types, thick hair
Length: Past shoulders
Styling time: 15-20 minutes

If you’re not ready to go short, long layers are your best friend. The trick is starting your layers at chin-level or below. This maintains enough weight at the bottom to keep things under control while removing bulk up top where it tends to poof out. I’ve had this cut myself and it’s the perfect compromise between length and shape.
My styling routine with this cut: Scrunch in curl cream on soaking wet hair, never brush dry (seriously, never), and either diffuse or air dry depending on how much time I have. The layers do most of the work for you. Some of my best curl days were when I literally just washed it, scrunched once, and walked out the door.
3. Curly Shag
Best for: Type 2-3 curls, fine to medium hair
Length: Medium (shoulder-length)
Styling time: 10 minutes

The curly shag is the cool-girl haircut right now and I’m here for it. Lots of choppy layers with optional curtain bangs, and the whole thing just looks effortlessly awesome with natural curl texture. It’s the haircut that makes people ask “how do you style your hair?” and you get to smugly answer “I don’t.”
What makes this cut work:
- Shorter layers throughout create volume even on fine curly hair
- Face-framing pieces curl around your features in the most flattering way
- Optional curly bangs (but cut them LONGER than you think — curls shrink, remember?)
- Tons of natural movement that only gets better as it air dries
4. Shoulder-Length with Face-Framing Layers
Best for: Type 3-4 curls, all thicknesses
Length: Shoulder-length
Styling time: 15 minutes
This is what I call the “safe but stunning” option. You keep your length, you get gorgeous shaping around the face, and it works in basically every professional setting. It’s flattering on everyone I’ve ever seen wear it. If you’re nervous about trying something new with curly hair, start here.
A tip that changed my life: Ask for a DevaCut or Rezo Cut. These are specialized cutting techniques designed specifically for curly hair. The stylist cuts each individual curl while your hair is dry, shaping around your unique curl pattern. The difference between a regular haircut and a curl-specific cut is genuinely dramatic. Worth seeking out a certified specialist, even if it costs more.
5. Tapered Natural Cut
Best for: Type 4 curls, coily hair
Length: Short to medium
Styling time: 5-10 minutes

The tapered natural cut is gorgeous on coily hair. Volume on top, gradually shorter on the sides and back. It’s low-maintenance, it looks professional, and it celebrates the natural texture instead of trying to tame it. I’ve seen this cut absolutely transform people’s confidence. There’s something powerful about wearing your natural texture proudly.
6. Curly Pixie Cut
Best for: Type 2-3 curls, confident personalities
Length: Short all over
Styling time: 5 minutes
Bold move? Sure. Worth it? Absolutely. A curly pixie shows off your curl pattern and your bone structure at the same time. It takes a certain level of confidence to go this short, but everyone I know who’s done it says the same thing: “I wish I’d done it sooner.” You’ll need trims every 4-6 weeks to maintain the shape, but your daily routine becomes almost nothing. Five minutes and you’re done.
Haircuts for Men with Curly Hair
7. Curly Undercut
Best for: Type 2-3 curls, thick hair
Length: Short sides, medium-long on top
Styling time: 5-10 minutes

The curly undercut is the best of both worlds for guys. Faded or buzzed sides take care of the bulk problem, while the longer curls on top get to do their thing freely. A little curl cream, maybe some scrunching, and you’re set. The key here is NOT over-styling. Let the curls be curly. That’s what makes this look work. I’ve seen too many guys try to tame the top into something straight-ish and it defeats the entire purpose.
8. Medium-Length Curly Flow
Best for: All curl types
Length: Shoulder-length or slightly shorter
Styling time: 10 minutes
For the guys who want to grow it out and embrace the curl, the medium-length flow is the way to go. Longer on top and sides with subtle layering to keep things shaped. Tie it back for sports or a job interview, wear it down when you want to look your best. Some of the best-looking hair I’ve seen on men falls into this category — there’s an effortlessness to medium curly hair that’s hard to beat.
The Curly Hair Cutting Rules
These aren’t suggestions. These are rules. I’ve broken every single one of them at some point and paid the price.
ALWAYS Get a Dry Cut
I cannot say this loudly enough. Cutting curly hair wet is basically gambling with your appearance. Curls shrink significantly as they dry — we’re talking 25-50% depending on your curl type. What looks like a perfectly reasonable length when wet can end up shockingly short when dry. Find a stylist who cuts curly hair dry. This is the single most important rule on this entire page.
Look for Certified Curly Cut Specialists
Not all stylists understand curly hair. That’s not a knock on them — it’s just a different skill set. Look for these certifications:
- DevaCut: The most well-known dry cutting technique. Each curl gets cut individually for a customized shape.
- Rezo Cut: Creates a beautiful halo of definition around the head. Really stunning results.
- Ouidad: Uses carving and slicing techniques for well-defined curls with lots of movement.
- Curl by Curl: Exactly what it sounds like — individual curl sculpting for maximum precision.
Stay Away from Thinning Shears
Thinning shears are the enemy of curly hair. They cut individual strands at random lengths, which creates frizz and disrupts your curl pattern. If your stylist reaches for thinning shears, speak up. The right way to remove bulk from curly hair is through strategic layering, not thinning. I had a stylist use thinning shears on me once and it took months to recover.
Essential Curly Hair Care

The Curly Girl Method Basics
You’ve probably heard of the Curly Girl Method. It sounds complicated but it’s really just three steps done consistently. Here’s how I do it:
1. Cleansing:
- Sulfate-free shampoo or co-wash (conditioner only washing). Sulfates strip moisture from curly hair that’s already naturally dry.
- I wash 1-2 times per week max. More than that and my curls get angry.
- Focus shampoo on the scalp where oil actually builds up. Don’t scrub the lengths — they don’t need it.
2. Conditioning:
- Use WAY more conditioner than you think you need. Curly hair is thirsty. I go through conditioner about three times faster than shampoo.
- Detangle with a wide-tooth comb while the conditioner is in. Never detangle dry hair.
- Squish conditioner into curls — don’t just rinse it all out. A little left in adds moisture.
- Deep condition weekly. This isn’t optional for me anymore. I can tell the difference when I skip it.
3. Styling:
- Apply products to soaking wet hair. Not damp. Soaking. The water helps distribute everything evenly.
- Scrunch in curl cream or gel with an upward motion. This encourages curl formation.
- Use a microfiber towel or old t-shirt to scrunch out excess water. Regular terry cloth creates frizz. I learned this years too late.
- Air dry or diffuse on low heat. Patience is key here.
- Once completely dry, “scrunch out the crunch” if you used gel. Your curls go from crunchy to soft and defined.
Products I’ve Actually Tested
Cleansers:
- DevaCurl No-Poo — the sulfate-free cleanser that started it all for me
- SheaMoisture Coconut & Hibiscus Shampoo — great for thicker curls and more affordable
- As I Am Coconut CoWash — my favorite for co-wash days
Leave-In Conditioners:
- Kinky-Curly Knot Today — detangles like nothing else I’ve tried
- Cantu Shea Butter Leave-In — budget-friendly and it works
- It’s a 10 Miracle Leave-In — splurge-worthy but genuinely makes a difference
Curl Creams & Gels:
- DevaCurl SuperCream — defines without any crunch whatsoever
- Eco Styler Gel — maximum hold for the price. Hard to beat the value here.
- Miss Jessie’s Pillow Soft Curls — makes curls feel incredible
- Ouidad Advanced Climate Control Gel — humidity? What humidity? This stuff handles it.
Styling Techniques That Actually Work

The Scrunch Method
- Apply your product to soaking wet hair
- Cup a section of hair in your palm
- Squeeze upward toward your scalp, again and again
- This encourages curl formation and definition — it’s like giving each curl a little pep talk
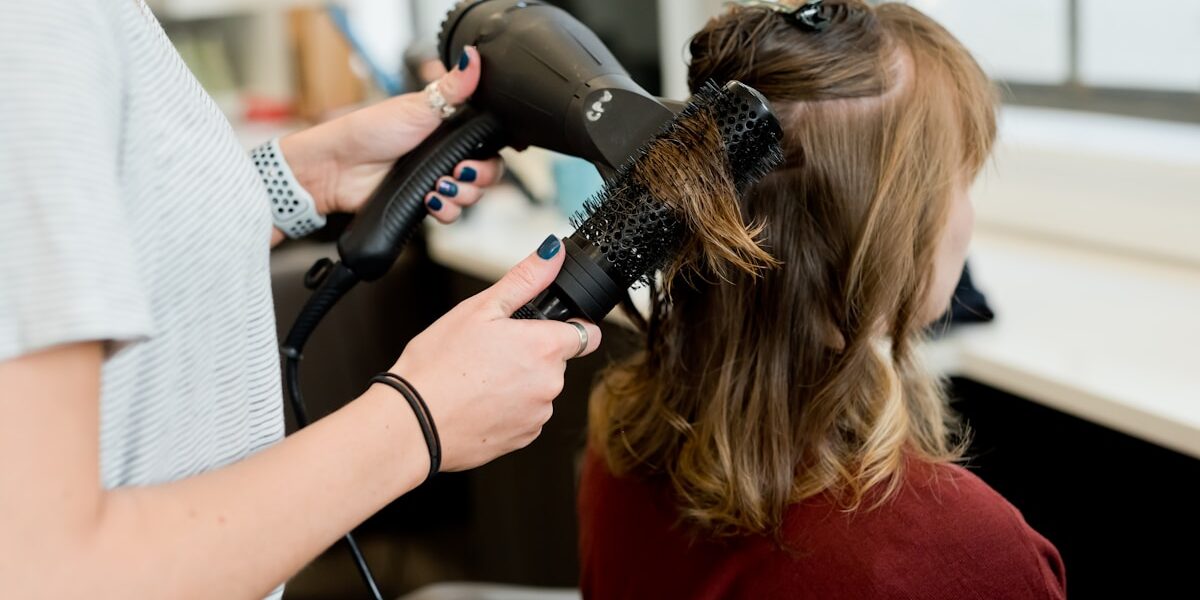
Diffusing for Volume
- Attach a diffuser to your blow dryer. Low heat, low speed. That’s what makes diffusing curly hair endearing to us curl enthusiasts — the gentle approach gets better results than blasting it.
- Cup your curls into the diffuser bowl and bring it up to your head
- Hold for 10-15 seconds in one spot, then release and move
- Do NOT rub the diffuser around your head. Static position only. Movement equals frizz.
- Dry about 80% of the way, then let the rest air dry for the best texture
Pineapple Method for Sleeping
This trick saves your curls overnight so you don’t have to start from scratch every morning:
- Gather all your hair into a very loose, high ponytail on top of your head (like a pineapple)
- Use a silk or satin scrunchie — never a regular elastic, which will dent and crease your curls
- Sleep on a satin pillowcase for bonus protection
- In the morning, take it down, shake it out gently
- Refresh with a spritz of water if any sections fell flat overnight
Common Curly Hair Problems (and What I Did About Them)
Problem: Frizz
What actually helped me:
- Stopped touching my hair while it was drying. Hands off. Seriously.
- Used more product than I thought I needed — under-applying was causing most of my frizz
- Switched to a satin pillowcase
- Started deep conditioning weekly instead of monthly
- Ditched silicones and sulfates from my routine
Problem: Undefined Curls
What fixed it:
- Applied products to much wetter hair than before
- Switched from cream to gel for better definition
- Tried the “rake and shake” method — game changer
- Got a proper curl-specific cut that removed dead weight
- Finger-coiled the stubborn front sections that refused to cooperate
Problem: Triangle/Pyramid Shape
The solution:
- Layers, layers, layers. Starting higher up than I expected
- Reduced weight on the sides
- Got a proper curl cut from a specialist (not just any stylist)
- Used lighter products that didn’t weigh down the top
Problem: Flat Roots, Poofy Ends
What worked:
- Diffused the roots first to get lift before they dried flat
- Applied less product at the ends where buildup was pulling things down
- Got the ends trimmed more regularly to remove weight
- Used a volumizing foam just at the roots
How Often to Trim Curly Hair
- Short curly cuts: Every 6-8 weeks to keep the shape looking intentional
- Medium to long curly hair: Every 8-12 weeks to deal with split ends before they travel
- If you’re growing it out: Every 12-16 weeks, trimming just the damaged ends and nothing more
Something most people don’t realize: Split ends travel UP the hair shaft faster in curly hair because of the spiral structure. Regular trims aren’t just cosmetic — they’re protective. I skipped trims for six months once and lost three inches of length to damage that could’ve been prevented with quarter-inch trims along the way.
Transitioning Back to Natural Curls
If you’ve been heat-styling for years and want to see your natural texture again, here’s the roadmap I followed:
- Stop heat styling entirely. Cold turkey. No “just this once.” Your hair needs a clean break to recover.
- Get a fresh cut to remove the most damaged ends. This gives your natural texture a fighting chance.
- Start the Curly Girl Method — sulfate-free everything, tons of moisture, gentle handling.
- Be patient. This is the hardest part. It took me about 3 months before my curl pattern really started coming back. Some people need 4-6 months.
- Protein treatments help rebuild the internal structure of heat-damaged curls. I did one every two weeks during my transition.
- Accept the awkward phase. Your hair will look weird for a while. Hats, headbands, and braids are your friends during this time.
Celebrity Curly Hair Inspiration
- Zendaya: Those long curls with face-framing layers? Stunning every single time.
- Tracee Ellis Ross: The queen of natural curls. She’s worn every length imaginable and looked incredible in all of them.
- Timothee Chalamet: Proof that effortless curly hair on men looks absolutely fantastic.
- Yara Shahidi: Her natural curls in protective styles are consistently gorgeous.
- Harry Styles: That long curly flow? Yeah, it works.
What I Wish Someone Had Told Me
- Invest in a good curl specialist stylist. Yes, they cost more. Yes, it’s worth every single penny. The difference between a regular cut and a curl-specific cut changed my entire relationship with my hair.
- Moisture, moisture, moisture. Curly hair is naturally drier than straight hair. You can almost never over-moisturize.
- Less cutting is sometimes more. Curls shrink dramatically when dry. A good curl stylist accounts for this.
- Stop fighting your natural texture. I spent years trying to straighten my way to “normal” hair and all I got was damage and frustration. Working with my curls instead of against them was the best hair decision I ever made.
- Online curly communities are gold. r/curlyhair, YouTube tutorials, Instagram accounts — there’s so much shared knowledge from people who figured this out before you.
- Finding your perfect routine takes time. Don’t give up after one wash day that doesn’t go perfectly. Experiment. Adjust. It’s a process.
The bottom line: Every curl pattern is unique and beautiful in its own way. The right haircut celebrates what you’ve got instead of trying to make it something it’s not. Find a stylist who gets that, invest in moisture, and give yourself grace during the learning curve. Your curls are worth it.
All images licensed under Creative Commons CC0 from Pexels.com